How to Add Tokens to MetaMask Wallet
MetaMask is an important bridge to decentralized applications (dapps), whether you want to create NFTs on OpenSea or use decentralized finance (DeFi) applications like Uniswap. MetaMask is a gateway into a new internet, which you can access without a centralized authority.
This article will cover how to add different tokens into your MetaMask wallet through a simple, step-by-step process. Though MetaMask is the bridge to decentralized applications, you're going to need a vehicle to cross that bridge. Ethereum and other ERC20 tokens will be the fuel that MetaMask uses to launch you into the world of decentralization.
Adding Tokens to MetaMask
Ether (ETH) is already added to your MetaMask by default. You won't need to go through this process to start depositing and withdrawing ETH. For other ERC20 tokens, you need to add them to your MetaMask asset tab.
ERC20 tokens are the standard protocol for smart contracts on Ethereum. You may recognize many of these like Uniswap, VeChain, Chainlink, and several others. This guide will show you how to add them to your Assets tab to purchase them later.
Before adding tokens to your MetaMask, you first have to set up your MetaMask. You can find out how to set up your MetaMask with this article.

Now that you're all set up, you can go to your browser extension. If you're using Google Chrome, it's the puzzle piece at the top. Click on the MetaMask icon and open the application.
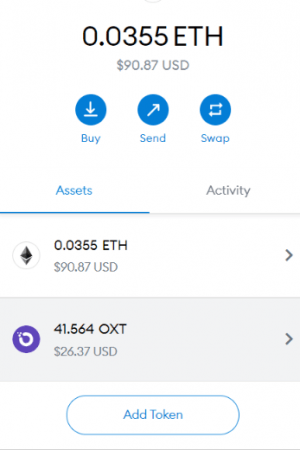
To add tokens to your MetaMask, go to the main MetaMask account page. Click on the assets tab, where you'll see Add Token at the bottom.
After you click Add Token, you can search for the type of token you want to add. Type it in the search engine like you would any other word on a search engine.
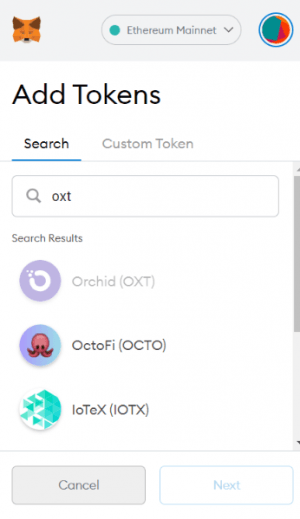
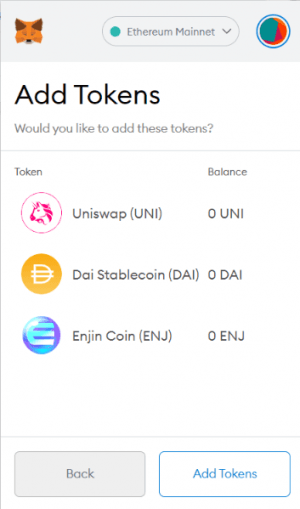
Once you search, you can click on your chosen token and add it by hitting next and adding tokens. You can search and add multiple tokens at once.
After this, you will be able to view your tokens on the Assets tab.
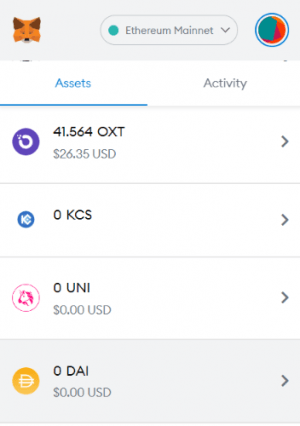
Once added, you will also have the option of swapping your chosen token for ETH or other ERC20 tokens on the blockchain. You have to click on your token on the Assets tab.

However, the classic way to add tokens is by going to the Custom Token tab and manually entering an address.
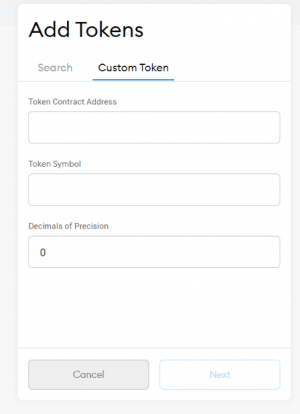
You will have to find the Token Contract Address and paste that onto the Custom Token tab on MetaMask.
This Token Contract Address is the location of the token contact that is responsible for the logic of the tokens. If your token of choice is not easily searchable, you will have to use the following steps to add your token to the Assets tab in your MetaMask.
To find the Token Contract Address, you can go to a block explorer like Etherscan. Specifically, you can type in the web address etherscan.io/tokens. You will be given a list where you can search for the specific contract address you are looking for.
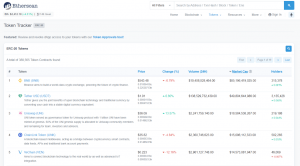
You can scroll down to find the token you want to add to your MetaMask and click on it. You can also go to the top right search bar and find your token there.
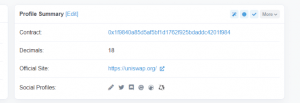
Once you're on the page of your chosen token, you will find a series of letters and numbers near the word Contract. Hover over it with your mouse, and you should be able to copy the address. Copy the address, go to the add tokens page in your MetaMask extension and click Custom Token.

Hit next, and you will be able to add the token and see it on your assets page again. You'll now be able to receive these tokens at your address, which we will cover in another article.
On mobile, the process is exactly the same. However, you might find it a bit harder to copy and paste the Contract Token Address on the mobile app.
And that's it! You've learned how to add your tokens and are a step closer to plunging into the decentralized ecosystem. Any time that you need tokens, you can refer to this guide's steps to do so.